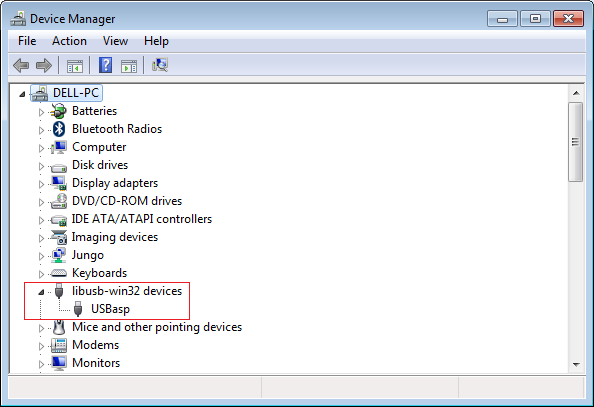
Step 1 - Intall the USBasp Driver
 |
| USBasp Driver |
Step 2- Go To the offical website
and update with the latest driver
Now USBasp will be discovered when USBasp hardware is plugged
Step 3 :- Download and install Keil for 8051 micro-controller https://www.keil.com/demo/eval/c51.htm
Step 4:- Open Keil UVision5 ->Create A new project -> Select
Micro-controller AT89S52 -> Add startup file -> right click on source
group 1 -> Add new item to the group 'source group 1' -> add .c file ->
copy and paste below c source code ->
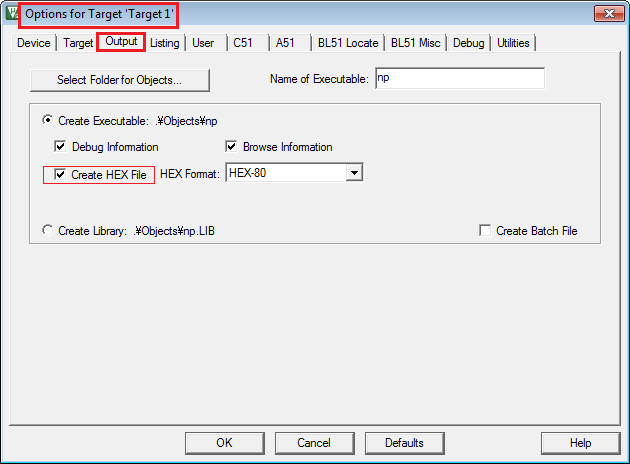
right click on 'Target 1' -> click on Option for Target - 'Target 1 ' ->
Go to output Tab -> enable 'Create Hex file' -> build the project ->
now hex file will be created
Build the project to generate Hex file
Step 5:- LED blinking C Program code ; connect led between Port 2-Pin 7 to GND
---------------------
#include <REGX52.h>
delay(unsigned int y)
{
unsigned int i,j;
for(i=0;i<y;i++)
{
for(j=0;j<1275;j++)
{
}
}
}
main()
{
while(1)
{
P2_7 = 0;
delay(100);
P2_7 = 1;
delay(100);
}
}
---------------------
Step 6:- Open Progisp , you will see under [program state] PRG ISP will become enabled from gray scale
Download link for progisp :- Progisp1.72.rar
Step 7 :- select the micro controller
, AT89S52
click on File - > Load Flash
-> select hex file -> click on Auto to load hex file to micro controller


No comments:
Post a Comment